Our summer has been jam packed with travel! We set off for our mom/daughter road trip…my first “girls trip” ever, and it just happened to be with my daughter. Pretty sweet! Our trek has taken us on a 5,000 mile cross country excursion that included seeing family, visiting friends and hitting 6 national parks in less than 2 weeks.
We hiked up to 11,000 feet in the Tetons and saw many different animals including bison, bear, a wolf and mountain goat, moose and more. We went from cool nights to scorching heat, all the while enjoying every minute of it! It’s a trip we’ll never forget. I hope she’ll look back on this time as a very special one…that we were able to share together.
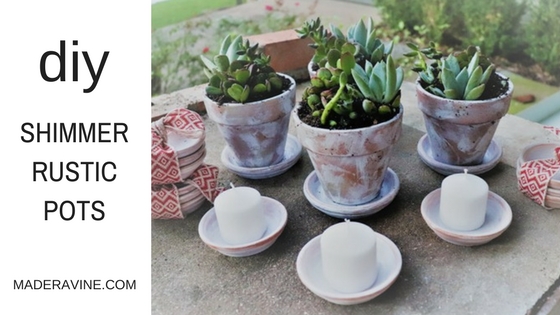
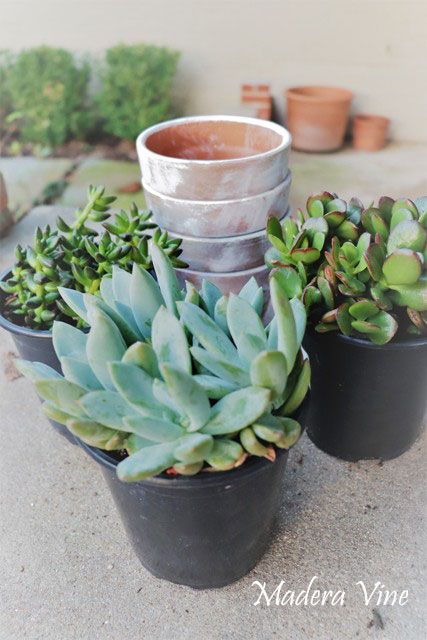
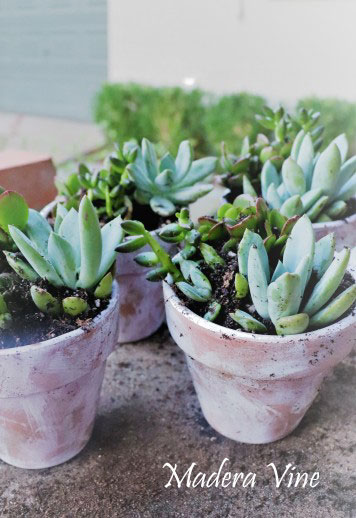
As we journeyed and stayed with family and friends, I wanted to give them a gift of thanks for having us in their home. I was inspired by the white washed terracotta pots I saw and decided to make that my project…with a twist.
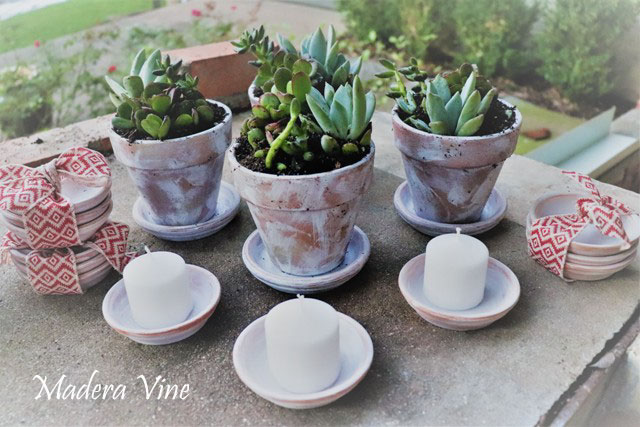
I like shiny things so I added some fun layers of pink and gold spray paint before the white washing occurred. I filled the pots with a variety of succulents and created votive candle holders to match.
TO DIY these shimmer rustic painted pots, here’s what you’ll need:
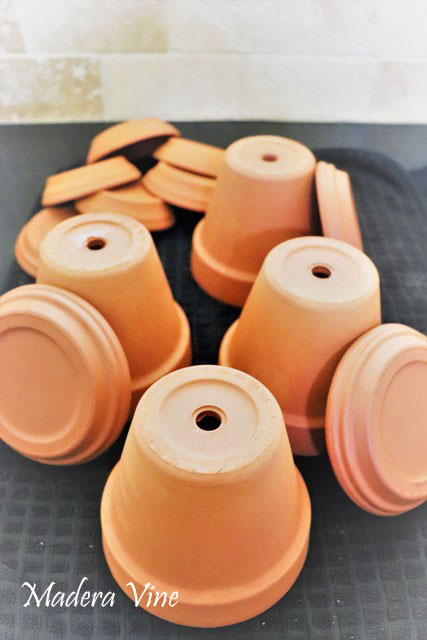
Clay pots with saucer (4”)
Clay saucers for candles (3”)
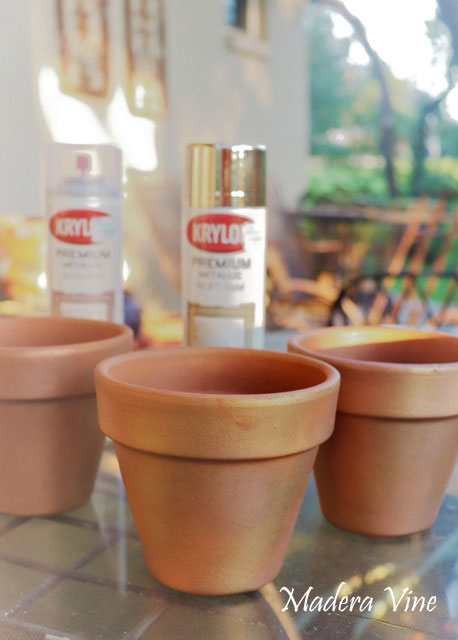
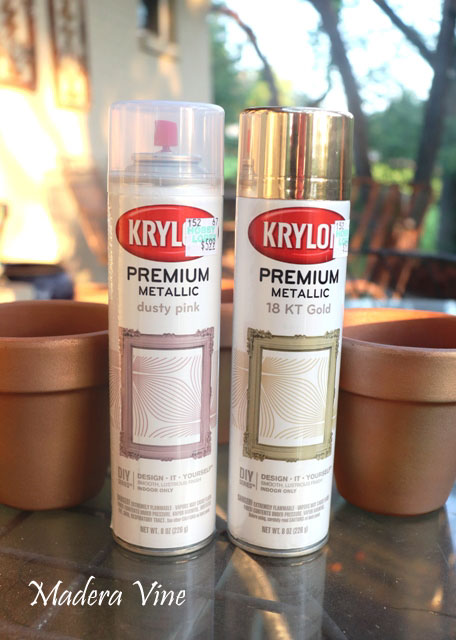
Metallic Gold Spray Paint Hobby Lobby
Metallic Dust Pink Spray Paint Hobby Lobby
White acrylic paint
Paint brush
Old rag or paint cloth for whitewashing
Plastic cups for whitewash
Paper to cover your surface
3 1-qt succulents of your choice (no extra potting soil was needed) Lowes $4.98 each
Candles: I found a value pack at Hobby Lobby. (8) 1 3/4″ x 1 3/4″
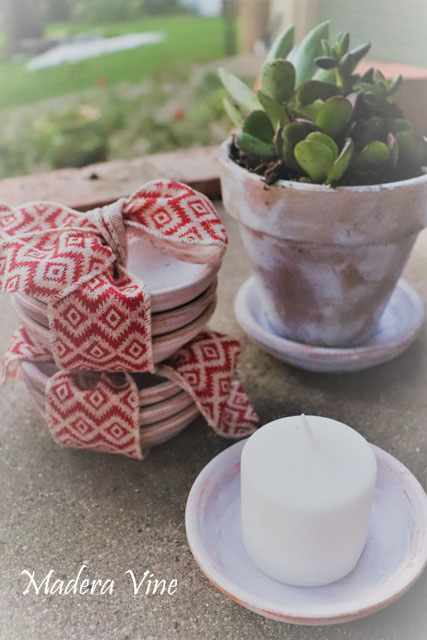
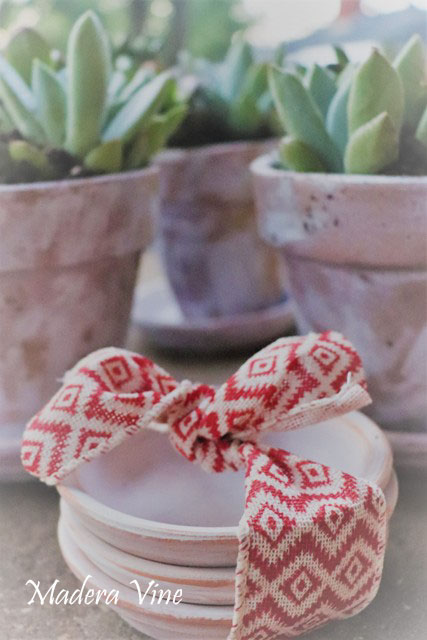
Ribbon to tie up the candle trays (I found a fabulous fabric ribbon at Hobby Lobby with wire)
Gift box or bag of choice
DIY Time
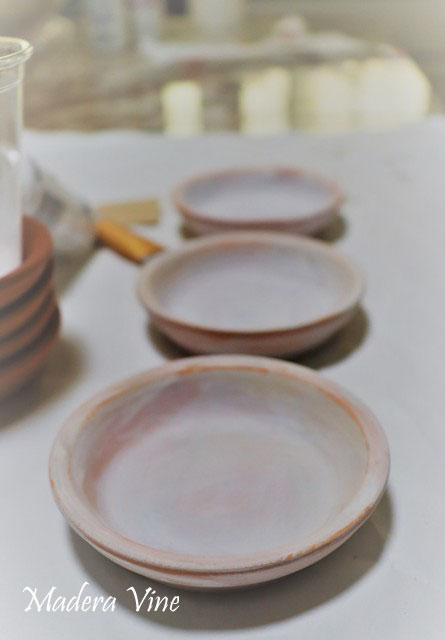
To start, I selected a 4” clay saucer and pot to match. It’s recommended that you wash them with soap and water before painting. I didn’t complete this step on every saucer I painted as a little test. I’m not clear on why you wash them, but it may simply be to remove any grime or dirt. Once the clay pieces are washed, drying time is very minimal.
Take your pots outside to spray paint. I used two different colors (pink and gold). I randomly sprayed each pot with both colors to add a little shimmer behind the final whitewash layer. While the pots dry, head back to your saucers. You an add a little shimmer to those as well, or leave them alone. Your choice.
To whitewash the pots and saucers, mix a small ratio (50/50) of water and white acrylic paint. I might have used a couple tablespoons of paint (at the most) to paint all you see here. A little goes a long way when using this technique.
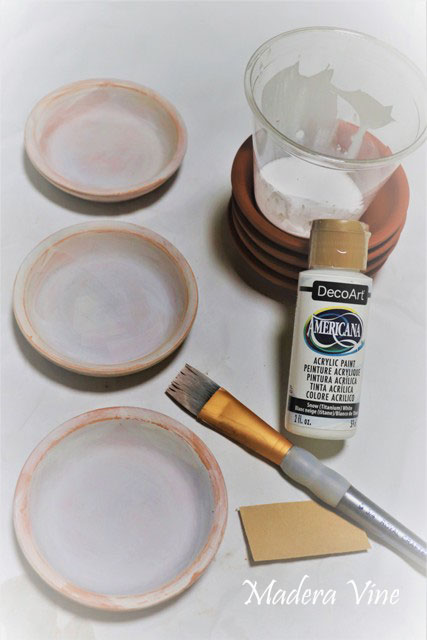
Brush on the watered down paint haphazardly. Then come back with a soft, clean cloth and wipe away or blend the paint with the pot. If you want to remove some paint once it’s on, wet the cloth slightly and wipe on the pot to remove paint in the areas you choose.
Another technique I tried once the paint was dry, and it dries real quick, was sanding the pots with a fine grade of sand paper. It removes the paint and you’ll also see some of the clay. Go lightly if you choose to try sand paper. I did it on the candle holders to give them a rustic, chippy look.
I was pleased how they turned out, but did notice that you can rub too hard due to the porous material. Experiment and have fun. You cannot mess this up!
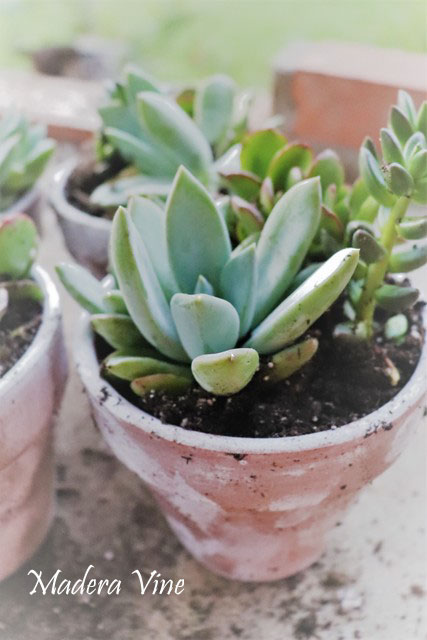
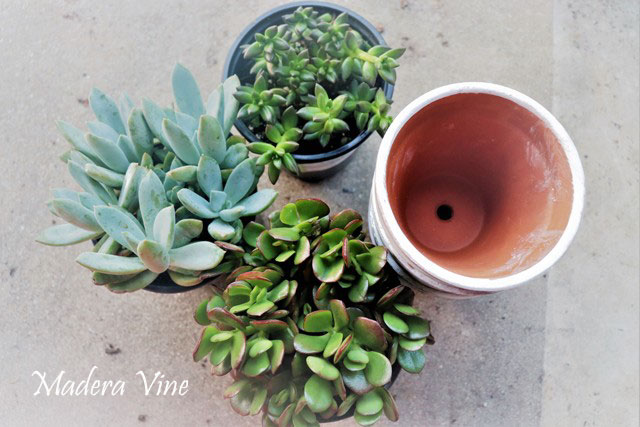
As the pots and saucers were drying, I headed outside to the succulents. I purchased three different ones that I could break apart into four different pots. I selected the ones in the photo because I liked how they looked together. They do multiply if they have room to.
If the succulents remain contained, I was told the plants adapt to whatever environment they are in. Their soil is all they need and no extra special material was added to the pots. The plant expert at Lowes did share that succulents like a drier base which is why they recommend using a potting soil that is fast drying. I didn’t need any extra soil due to the size of my pots, but should you need extra soil for cactus or succulents, try this.
I carefully removed each succulent and divided them up into four piles, per pot. Look for succulents that have individual stocks; they are easy to divide. Replant them in each pot and fill in with any extra soil that is left over. It’s quick and simple, just be gentle with each plant because their leaves can fall off easily.
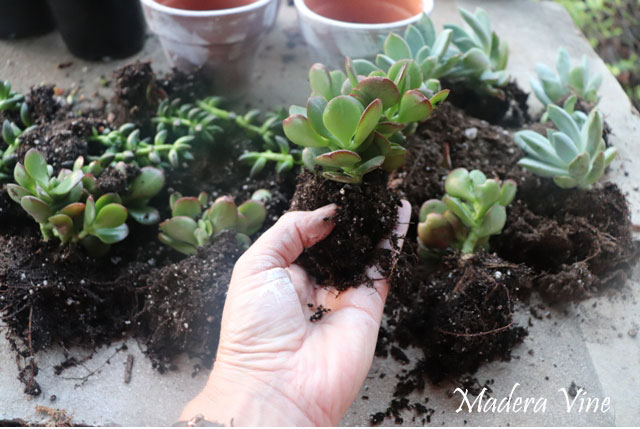
Once complete, add a little moisture to them and wipe down each pot.
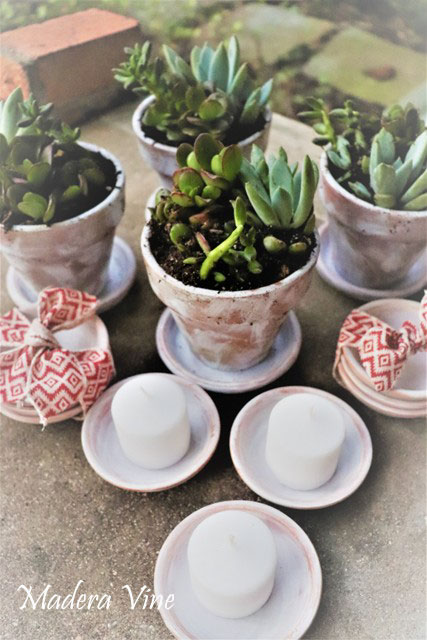
For the candle holders, I found a beautiful cloth ribbon at Hobby Lobby with wire in it. It made it real easy to tie up the saucers. You could also place a candle in each saucer and wrap them up individually should you care to do so. I was traveling and space was an issue so this is how they were delivered.
My hosts seemed to really enjoy these little gifts, made with love. I hope that when they use the candles and water the succulents, they are reminded of us and our love for them.
I hope you try this fun and easy DIY project! It’s a simple one to do and is nominal in cost, especially when you buy the succulents in quarts and break them up to create your own unique planter. Whether you keep them for yourself, or give them as gifts… let me know if you try this and how it goes. I’d love to hear about it!
We’re about to head home on our last leg of our journey. It’s been an incredible month traveling and I’m so blessed to have experienced this with my daughter. What a gift! If you made an amazing summer memory with your family, please share below.
Here’s one of my daughter’s favorite quotes by Ferris Bueller. I thought you might enjoy it as much as I do.
“Life moves pretty fast. If you don't stop and look around once in a while, you could miss it.”Click To TweetTake the time to make great memories. Get a little crafty. Never be afraid to try something new because life does move pretty fast!
Cheers to you and yours!

No Comments