

Week 1 / Week 2 / Week 3 / Week 4
Where does the time go? I know…into planning, research, prep-work and demo. Our hall bath renovation is underway and we’ll have it done next week, by the grace of God.
The One Room Challenge participants are creating some amazing spaces. I’ve so enjoyed watching their progress and learning what they are doing. Their final reveals next week will be awe-inspiring! Be sure to catch up on what’s happening this week.
While I don’t have a ton to share in terms of photo updates, I’m going to share some tips with you that I’ve learned to prep this room, bring it up to date and up to code.
TILE
We found tile! YAY! I ended up getting it from two different locations, one in Asheville and the other in Greenville, SC. It took persistence, but the good news is I didn’t have to make a six-hour round trip to obtain it. My friend Nina at The Tile Shop, in Greenville, hooked me up and she’s just an hour down the mountain!
I’m excited to show you what we chose as the final floor. It came down to availability and budget.
INSTALLATION OF TILE
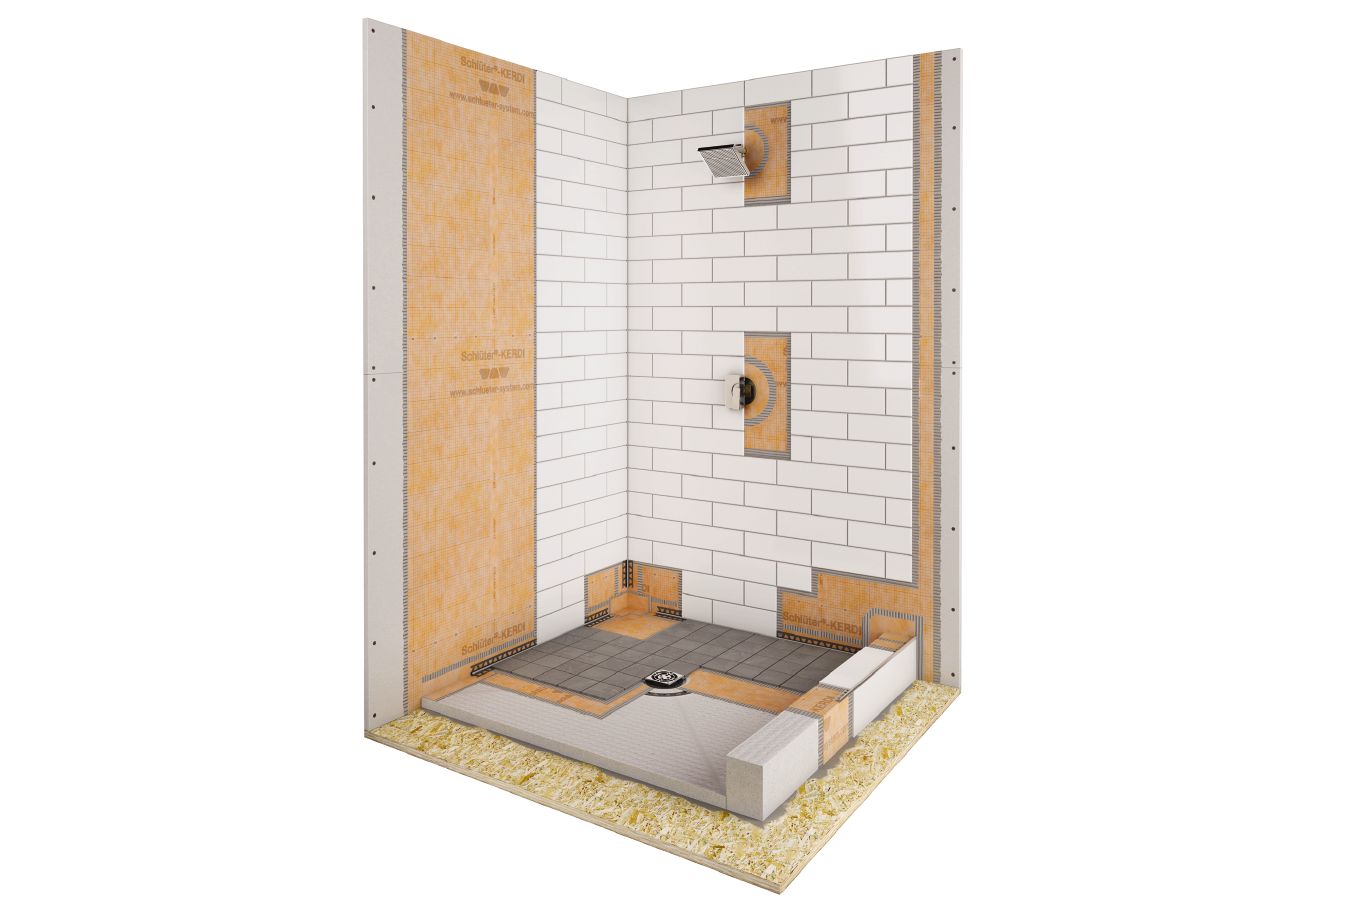
I was preparing to have a concrete pan poured for our shower, but there is a more modern solution with the Schluter System. I watched several different videos and talked with multiple contractors about it. The system costs more up front but saves you time in labor so it’s really a trade-off. Plus, you can install tile quicker because you don’t have to wait for the concrete to cure. I’ll do a more in-depth blog post on this after the ORC.
 Source
I like the orange color, don’t you?
ELECTRICAL
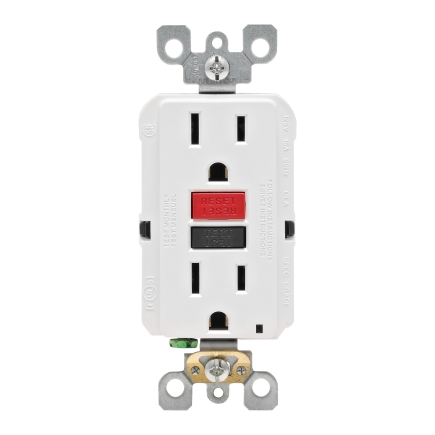
We met our super cool electrician, Keith. He was referred to me and I instantly liked him. Keith reminds me of someone I know or should know…and now I do. He was great and totally got my vision of the job. We discussed the electrical outlet as well. I don’t like where it’s placed so I want to move it. We’re going to upgrade it to a GFCI outlet.
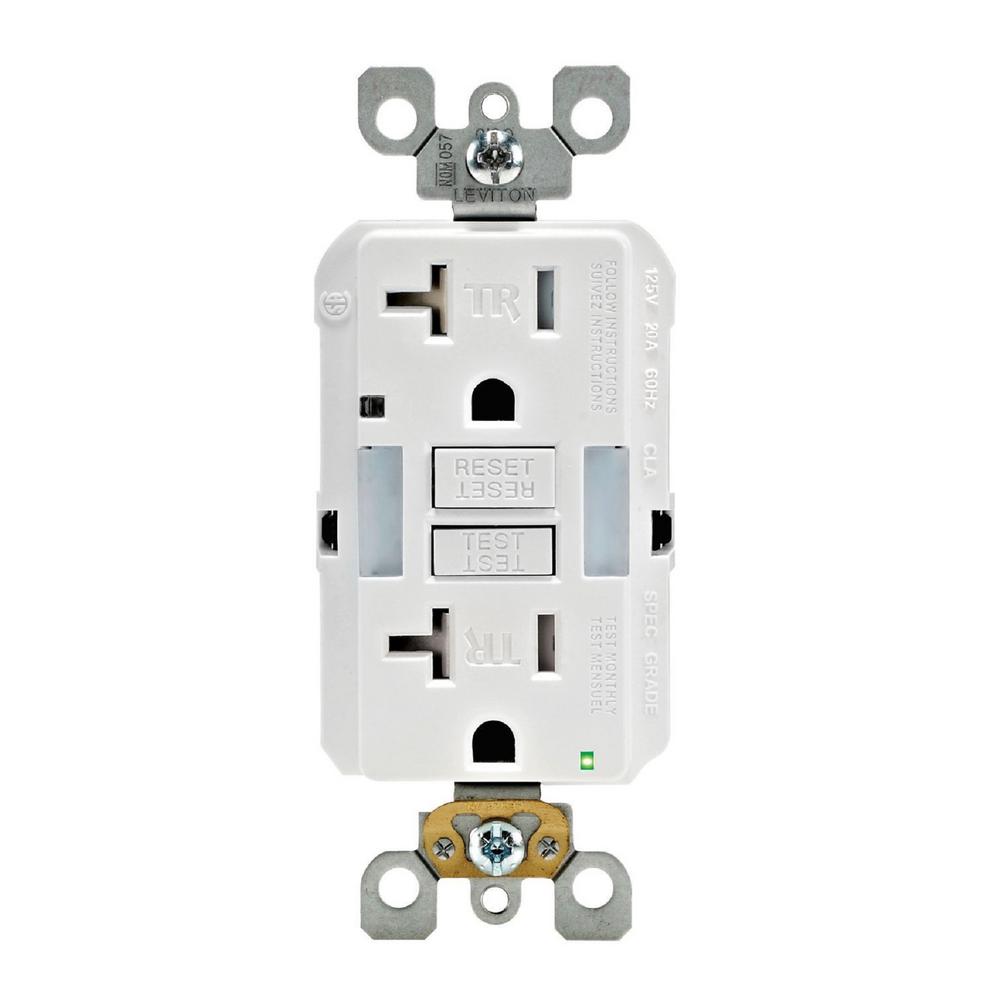
GFCI stands for Ground Fault Circuit Interrupter. It’s a special outlet that can prevent electrical shock in wet locations such as bathrooms, kitchens and outdoor areas. If it gets tripped, the outlet will cut off the electricity to it. You reset it by pushing the reset button. Current housing codes require these. Our home is not equipped with them in the bathrooms so it’s something that needs to be updated. You can easily change this out yourself if you like to DIY things. Since we want to move the outlet location, we’re getting professional help…from Keith.
One thing to note. Keith did share with us that home inspectors immediately notice if wet areas do not have GFCI outlets. If you’re planning on selling your home, get these areas updated before a home inspector comes. Better yet, hire your own home inspector to walk through your home before potential buyers come in, and make all necessary fixes. This will help you get a higher price because everything is up to code and up to date, and you have less negotiating to do on the punch list. Win! Win!
POCKET DOOR
I’m really excited about saving our current door and reusing it. I’ll have a little patch work to do, but the great thing is they make hardware to fit where a door knob was. This saves time and money.
Here’s a look at the hardware we chose. The main reason, besides it fitting into the current opening, is that the knob used to lock the door is easy to turn with all sizes and ages of fingers. We have grandparents that come visit and they are experiencing arthritis in their hands. This latch will be much easier for them to turn than some of the others we found.

WALL PREP
Our walls are terrible! I think Freddy Kruger came through our house at some point to help texture the walls. Seriously!
I wanted to cover them up but decided on a wall treatment that would leave them mostly exposed. I didn’t want to incur the extra cost of hiring someone to make them smooth so I’m trying a method I recently learned about. Thank goodness for Google!
I’m almost a remodeling genius because of what I’m learning. Just kidding…I have a LONG ways to go. But, I am wiser.
I’m skim coating the walls by thinning down drywall mud with water to the consistency of mayonnaise. They recommend rolling it on the walls, but I had to use a trowel because my roller seemed to absorb more of the mud than it actually put on the wall. I’ll keep practicing.
After the mixture is on the walls, I come back with a big squeegee. I bought the wrong type because it’s all they had and I forgot to write down the name. The one I purchased is acutally used for window cleaning. The proper squeegee to get is one contractors use called a “squeegee knife”; you see it in the picutre below.
Here’s the tutorial I read from the Family Handyman. My experience didn’t go exactly like their pictures show, but I’m making progress. The whole process of rolling one and squeegeeing off is a bit therapeutic. I need to turn some music on for the next go round.
You’ll see my final results in the blog reveal and my Facebook Live reveal next week.

How to skim coat walls.
So that’s what happening.
- Demo is under way.
- I’m skim coating the walls.
- And the big work is to come.
I’m focused on my team and I pulling this bath reno out. We are hiring a licensed plumber and electrician to help us get this right…the first time. And while I planned on doing most of the work ourselves, my husband is feeling a bit more reluctant because he doesn’t want to practice new found knowledge on this room. We’ll see what happens in the end, and our budget will reflect the changes.
Sometimes you gotta roll with it. I’m just glad to see progress being made.
Be sure to check out all the other One Room Challenge posts! I can’t wait to see them myself.
By the way, I have a few secret design elements that I’ll show you in the reveal next week. Design changes have happened since I first showed you my Style Boards in Week 1. This is normally how I work. I let the design evolve with me as the project goes, especially if I’m not 100% sure of it in the beginning.
Design won’t save the world, but it damn sure will make my bathroom look good!Click To TweetMost importantly…
Happy Cinco de Mayo! In honor of this day, I found some yummy margarita flavors you can try. We can always find a fun reason to celebrate life, right? I particularly like the look of this Pink Prickly Pear margarita! Go ahead and make yourself one, while you sit back, relax and enjoy catching up on all the fabulous ORC projects.

Cheers!

I can’t wait to see everything! Love that pocket door hardware!!
Thanks Emy! The pocket door didn’t happen unfortunately. The cost was more than we cared to spend for that. BUT…that will NOT define the room. 🙂 Can’t wait to share with you the final.
Looking forward to the reveal lady!
Me too!!! It’ll be soon. Watch for it! 🙂
I love that you’re taking the time to do this all properly and to the highest quality standards. We didn’t have any electrical or tiling work for our cottage bathroom reno which saved lots of time. Your space is going to look amazing when done!
Thanks Jane, I appreciate your comment. Boy, that kind of work (tile and electrical and plumbing!) requires lots of scheduling and patience. Almost there. 🙂 I’ll be posting soon!
6 Comments